Sensor rail system
The unique LabRail® system together with a LabSpion goniometer is a complete light measurement solution. The 2-axis goniometer enables the system to measure the full 3D light distribution of any light source giving lighting professionals comprehensive .LDT and .IES files.
The rail solution allows easy repositioning of the sensor. The sensor travels securely on the up to 16 m long rail along the optical axis. Once the light source is in place there is no need for further alignment of the sensor.
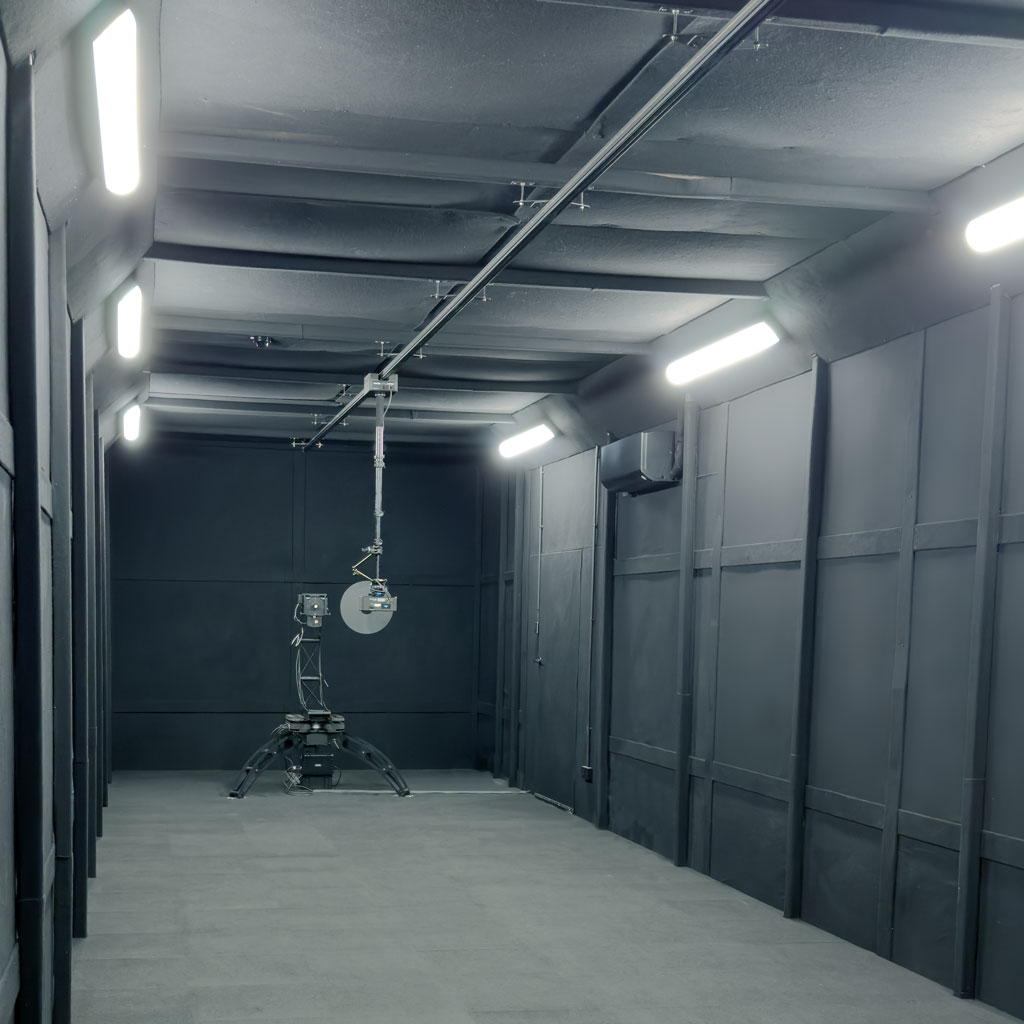
12 meters (8 x 1,5 m) of rail is standard – but both shorter and longer rails are available. The rail assembly is suspended from the ceiling in the laboratory. Sensor movement along the rail is motorized and sensor distance can be optimized for any size of light source. Power and data are transmitted seamlessly trough the rail eliminating all cables. Owners of LabSpion systems may replace the standard tripod arrangement with the rail system upgrade kit.
Mechanical assembly
There are two installations methods:
Either with brackets directly on the ceiling, or with a wire system
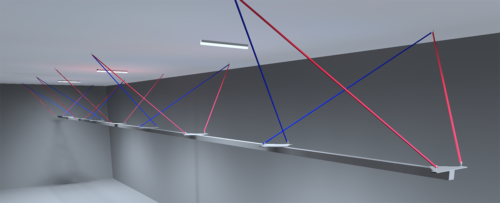
Installation with wires: Hook the suspension steel wires to your lab ceiling (12 m rail equals 9 wire sets and 18 hooks). Suspend the rail from the wire via griplock wire fasteners (3-4 persons needed). Level the rail and cut off excessive wire ends. Cross every other wire set to stabilize sideways
Installation without wires: Mount the installation brackets directly on your ceiling structure. Attach the rail system to the ceiling brackets, and carefully adjust to make straight and level.
The wire suspension is very flexible when it comes to ceiling heights. The suspension wires can be as long or as short as desired. Suspension hooks should be firmly attached to the building structure. Wires must be angled vertically about 35-55 degrees to the ceiling to improve stability. Gravity holds the construction in place.
The whole rail is assembled on the floor. The 1.5 m pieces are attached to one another with connection pieces for firm alignment and electrical connection. A small group of people then lifts the rail approximately the desired height (above head height, approx. 2 m elevation) while securing the rail to the connectors.
Slide on the dolly holding the telescopic arm onto the rail. Mount an injector module at at the far end of rail, and an end stop closest to goniometer. Connect the injector to the goniometer base with a single cable. Mount your LabSensor at end of the telescopic arm and adjust the arm to the height of the goniometer optical axis.
All power and communication from sensor and laser module goes through the rails and dolly, which means the rail is cable connected in one point. Viso LabTarget is included.
Prerequisites
Always contact Viso System to evaluate suspension options to make sure RailRRail is suited for your specific laboratory.
- The rail must be firmly attached to the building structure (not to suspended ceiling parts or the like)
- In wire suspension systems: Suspension wires must be symmetrical around the rail. All wires must be angled about 35-5 degrees to the ceiling
- Mounting directly on the ceiling is possible – please contact Viso Systems for more information.
Advantages
Works seamlessly with LabSpion
Never measure distance manually again
Repositioning of sensor in only 5 seconds
Perfect alignment every time
No cables. Data over power line
Free your floor space
Includes Viso LabTarget
Easy suspension from ceiling
Main applications
Downloads
Get more information
LabRail Specifications
Specifications
Sensor distance range: 35 cm to 1200 cm (standard – can be shorter or longer)
Sensor distance setup: Automatic
Power supply input 90 to 260 VAC, 50/60 Hz
Power 8 W idle / 90 W peak
Standard system weight @1200 cm
is approx. 25 kg
Other Viso Accessories
Add a LabTemp 3-port temperature probe system for monitoring ambient lab temperature and 3 temperature spots
The LabFlicker instrument records all contemporary flicker metrics including PstLM and connects to all Viso systems
The extender of the LightSpion allows you to measure lamps that are up to 22 cm in diameter by extending the sensor distance
Upgrade your existing sensor to provide a broader measurement range (eg. UV) or a more accuracy